Getting Started
ioAsset is distributed in an installation file (ioAssetInstall.exe) which is usually downloaded as a zipped file (ioAssetInst.zip).
Extract the installation file from the zip file and install the system.
Once ioAsset has been installed the user must decide how they wish to use the system - see Registration.
When opening the system for the first time after installing it a number of warning screens will appear;
- The first will warn that no Secure file (the file that records details of all the system users, their passwords and access levels is stored) was found. This is not a problem as the system will create a new file with one "master" record with the highest access level for the senior person to set up the system.
When ioAsset is opened for the first time a new "SECURE" (access control) file will be created with the user name and password both being set as "master".
After logging onto the system the only buttons (functions) available will be as per the screen below;

The buttons (from left to right) have the following functions;
- Company selection - permits selecting and opening a company (branch) and adding new companies (branches)
- License registration - the system is shipped as "unregistered" and will operate in "Demo" mode until either a "Evaluation" or "Live" registration.
- User Access Control - sets up and maintains users system users with their respective access levels, passwords and status
- System Help File - a comprehensive guide to using the system - prospective users are strongly advised to study the help file before using the system.
- Printer Setup - setting up the default printer.
IMPORTANT: Buttons 2, 3 and 4 are only active while "No Company is Active" as their functions are global and not unique to any single company.
Once a company (branch) is selected and becomes "active" these buttons will be replaced with buttons offering functions which relate only to the active company.
The system is shipped in "Demo" mode complete with a dummy company and dummy data to enable potential users to move through the various screens and functions to get a feel for how the system works.
After studying the Help File, and adding or changing any user access, click on the first button and select the Demo Company from the Company screen as seen below;
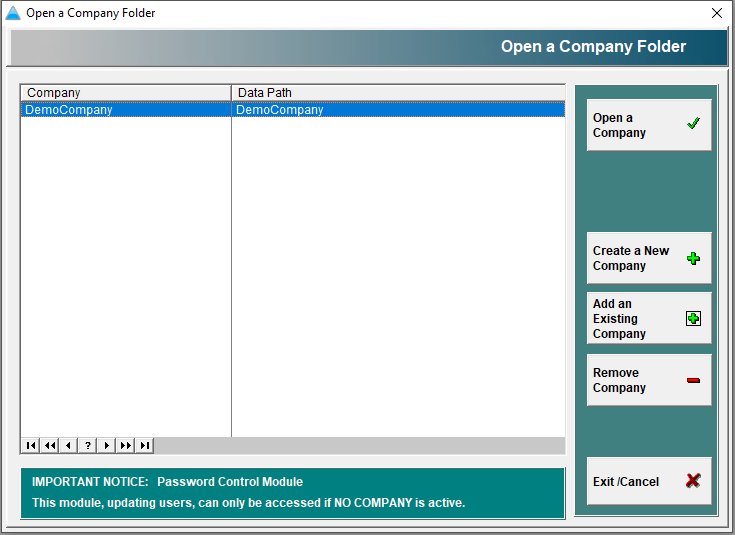
This will the enable the full menu screen for data specific only to the Demo Company.
Note, the company (branch) name open for editing will be shown on the right hand side of the menu screen as shown below;

TIP: During the evaluation period use the Demo Company as a training platform and use all the functions available to learn how the operate. In this way any mistakes you make will not compromise any of your live data.